
With the digitization in technology, reliance on marketplaces, and the recent pandemic has caused businesses to get online while customers stay indoors, e-commerce businesses are a rising trend. As per a Statista report, over two billion people purchased products online in 2020, and the number only continues to grow. If you’re a retail business owner, an online store is a great way to expand your business and promote it to a larger audience. Nevertheless, running a successful online business requires the right tools and solutions. Bluehost Online Store solution is one of the quickest ways to start selling online.
The Bluehost online store is built on the WooCommerce ecosystem and powered by WordPress. For the uninitiated, WooCommerce plus WordPress ecosystem allows businesses the flexibility to design and make customizations to their online store beyond the confines of predefined themes. It is one of the leading tools for beginners to set up their online store with ease. Bluehost’s online store allows you to manage your shipping, inventory, payments, taxes, and much more. However, with the online industry growing at a fast pace, businesses need to keep up with their customers’ growing demands providing them with an easy and interactive website buying experience.
Keeping this in mind, we at Bluehost are always upgrading our products and services to help grow your business effectively and equip you with the right set of solutions to stay ahead of the curve. We’re committed to making your online store a success.
We are excited to introduce some brand new additions to our Bluehost online store with an aim of enhancing your business and making it smooth for your customers to interact with you.
What has improved?
- Enhanced user experience
To help you set up your online store with ease and improve your customer experience, we at Bluehost have introduced a guided user experience to help you get started quickly and easily without much prior knowledge of WordPress.
With the guided user experience you can add store information, select payment methods, define shipping rules and add your first product to your online store with ease.
- New payment gateway
Bluehost has partnered with Razorpay, a leading payment gateway that allows your customers to purchase from your WooCommerce powered website easily and securely. Razorpay accepts payments securely across various modes viz. Credit & Debit cards, Netbanking, UPI, Wallet, EMI & Pay Later. Moreover, Bluehost offers one-click integration with RazorPay so you can accept payments on your online store without any hassle.
Along with all the features of RazorPay like low transaction fees, high performance, easy integration, detailed report on payments, and more, Razorpay will offer free credits worth ₹1 Lakh to every new merchant in the first year via Bluehost. As a Bluehost customer, you get to enjoy low transaction rates and free credits when you sign with the Bluehost referral link.
- Designed for your needs
To provide you with a hassle-free online store building experience we’ve introduced a supportive wizard to easily set up your e-commerce store with WooCommerce.
Along with this, to help you run the online store with ease, our experts have selected premium plugins and included them in our WooCommerce package all for free! Here are some of the newly added plugins:
- WooCommerce subscription plugin to manage recurring billings and product subscriptions
- WooCommerce bookings and appointments if you’re into an online reservation business
- WooCommerce product add-ons for easy customisation options on your products
Now that we’ve seen what online store hosting is and how it helps you aid your online store business, let us now understand how you can easily set up your Bluehost online store. Here is a step-by-step guide:
How to set up your first online store
After purchasing your e-commerce web hosting and domain name to set up your business website, it is now time to build your online store.
Step 1: Log in to your Bluehost account with the username and password. Post signing in you will be redirected to this page
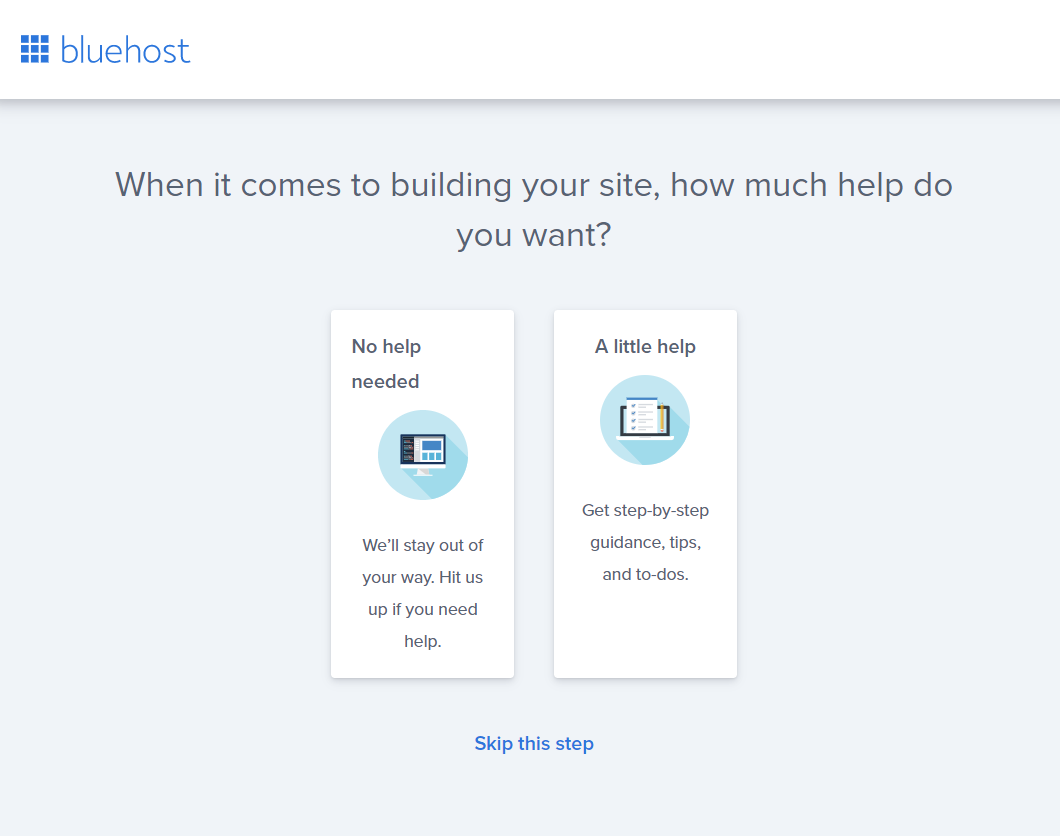
If you’re well-versed in setting up an online store, you can click on the ‘No help needed’ tab. However, if you are new to this, you can click on the ‘A little help’ tab.
We assume you are new and will proceed by clicking the ‘A little help’ tab to guide you through your online store setup process.
Step 2: Depending on the type of website you want to create, you can select one of the following options viz. Blog, Online Store, Business, Portfolio.
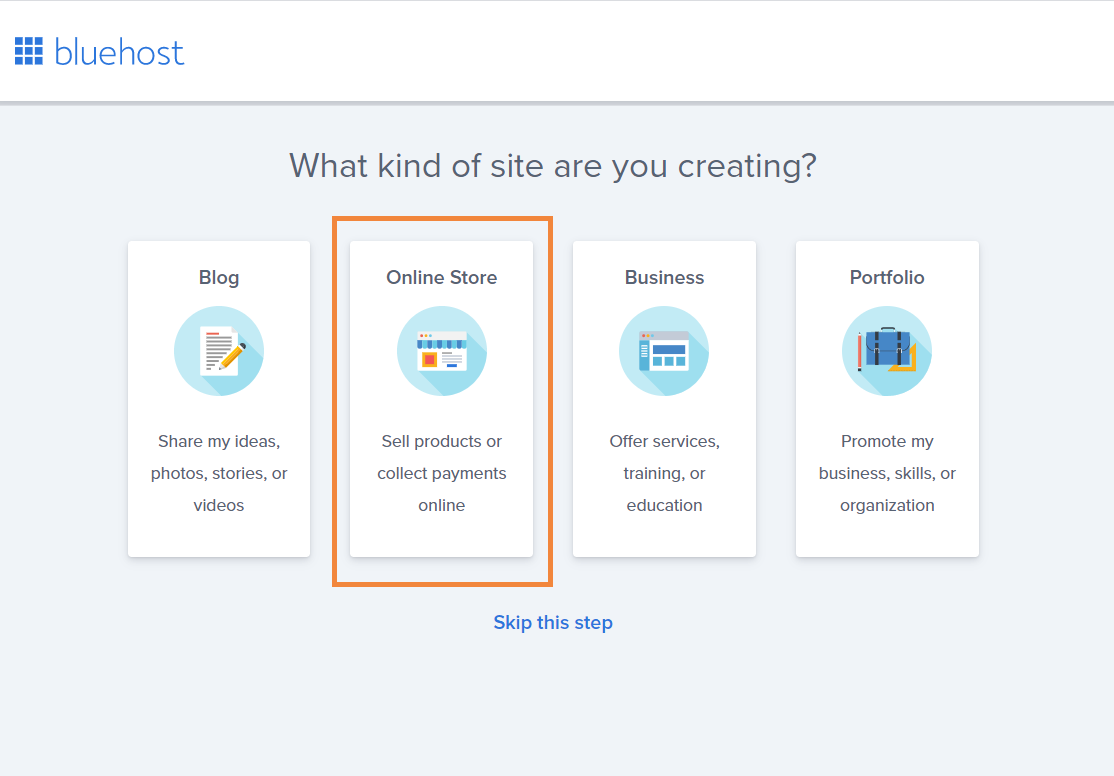 Since we are creating an online store, we will click on the ‘Online Store’ tab.
Step 3: How comfortable are you with creating a website?
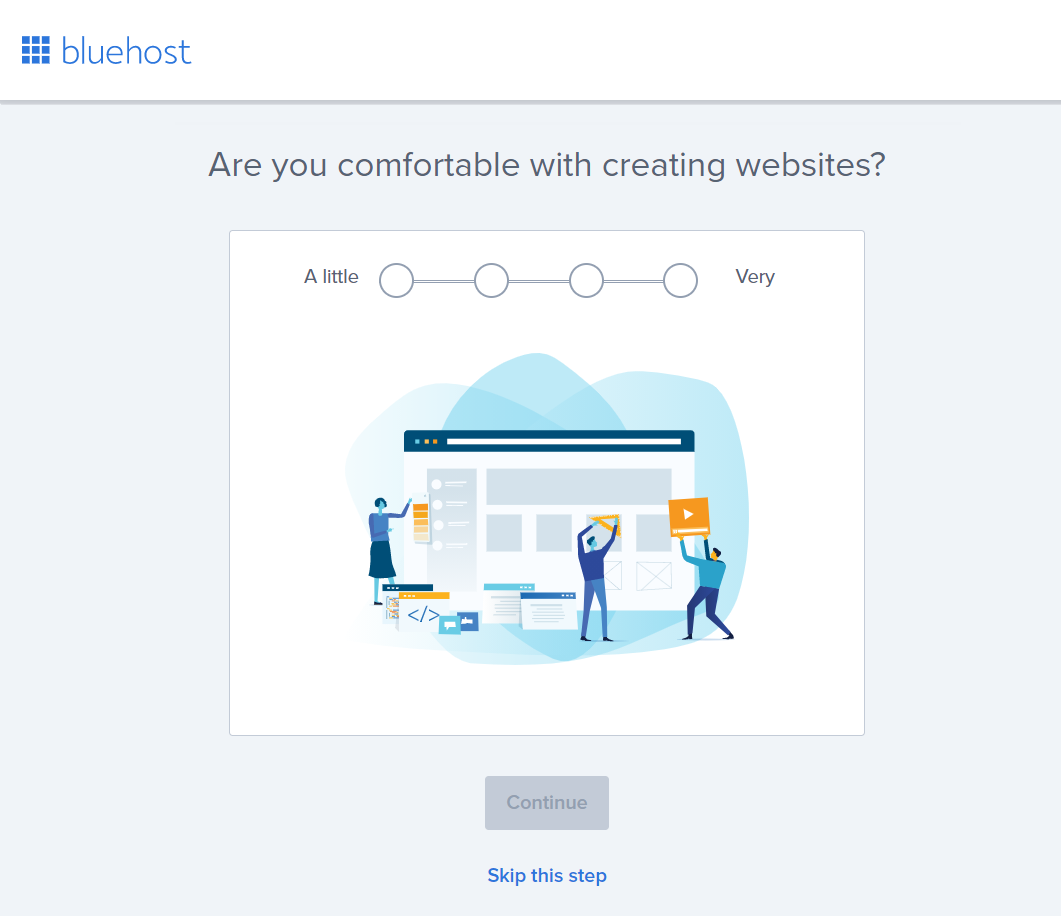 Choose your level of expertise on a scale of 1 to 4, where 1 is the least and 4 is the most experienced.
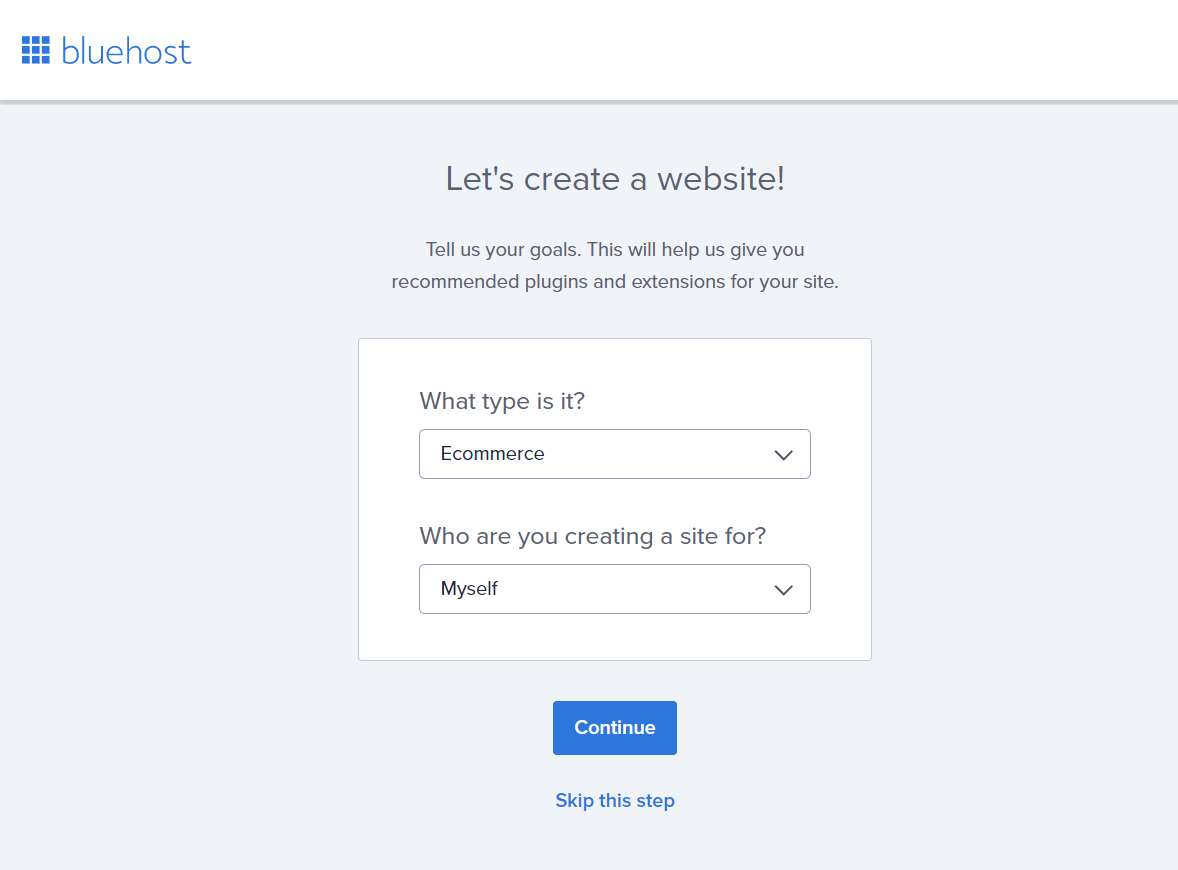
Step 4: Next, from the dropdown select the type of your website and who you are creating it for
Step 5: Give your website a name and a tagline. Depending on your website’s niche and domain name, give your website an appropriate name.
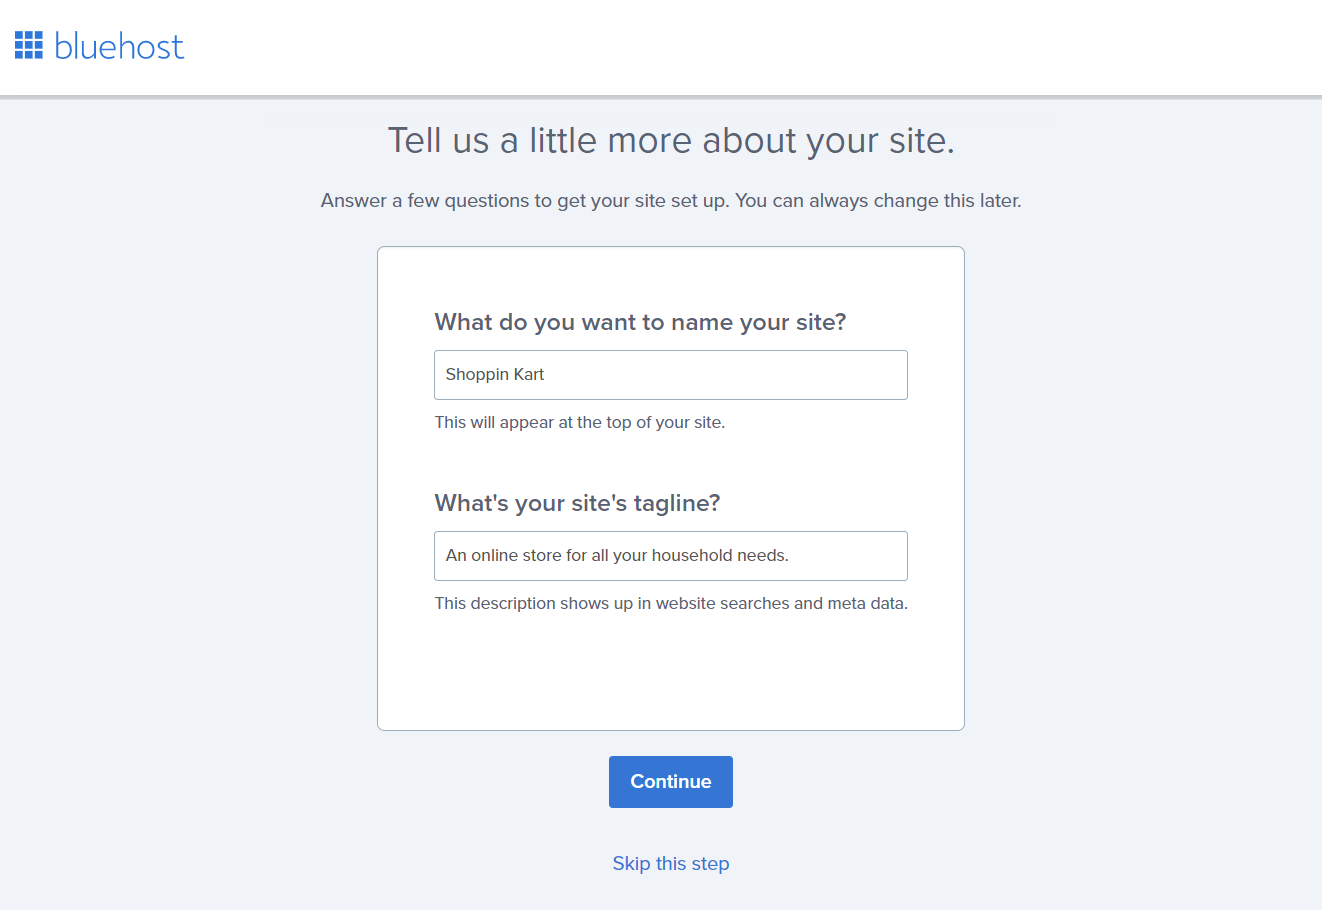
Note: Your website’s name is your identity, so make sure that you research thoroughly before deciding on a name.
Step 6: The next step is to select an appropriate theme for your website.
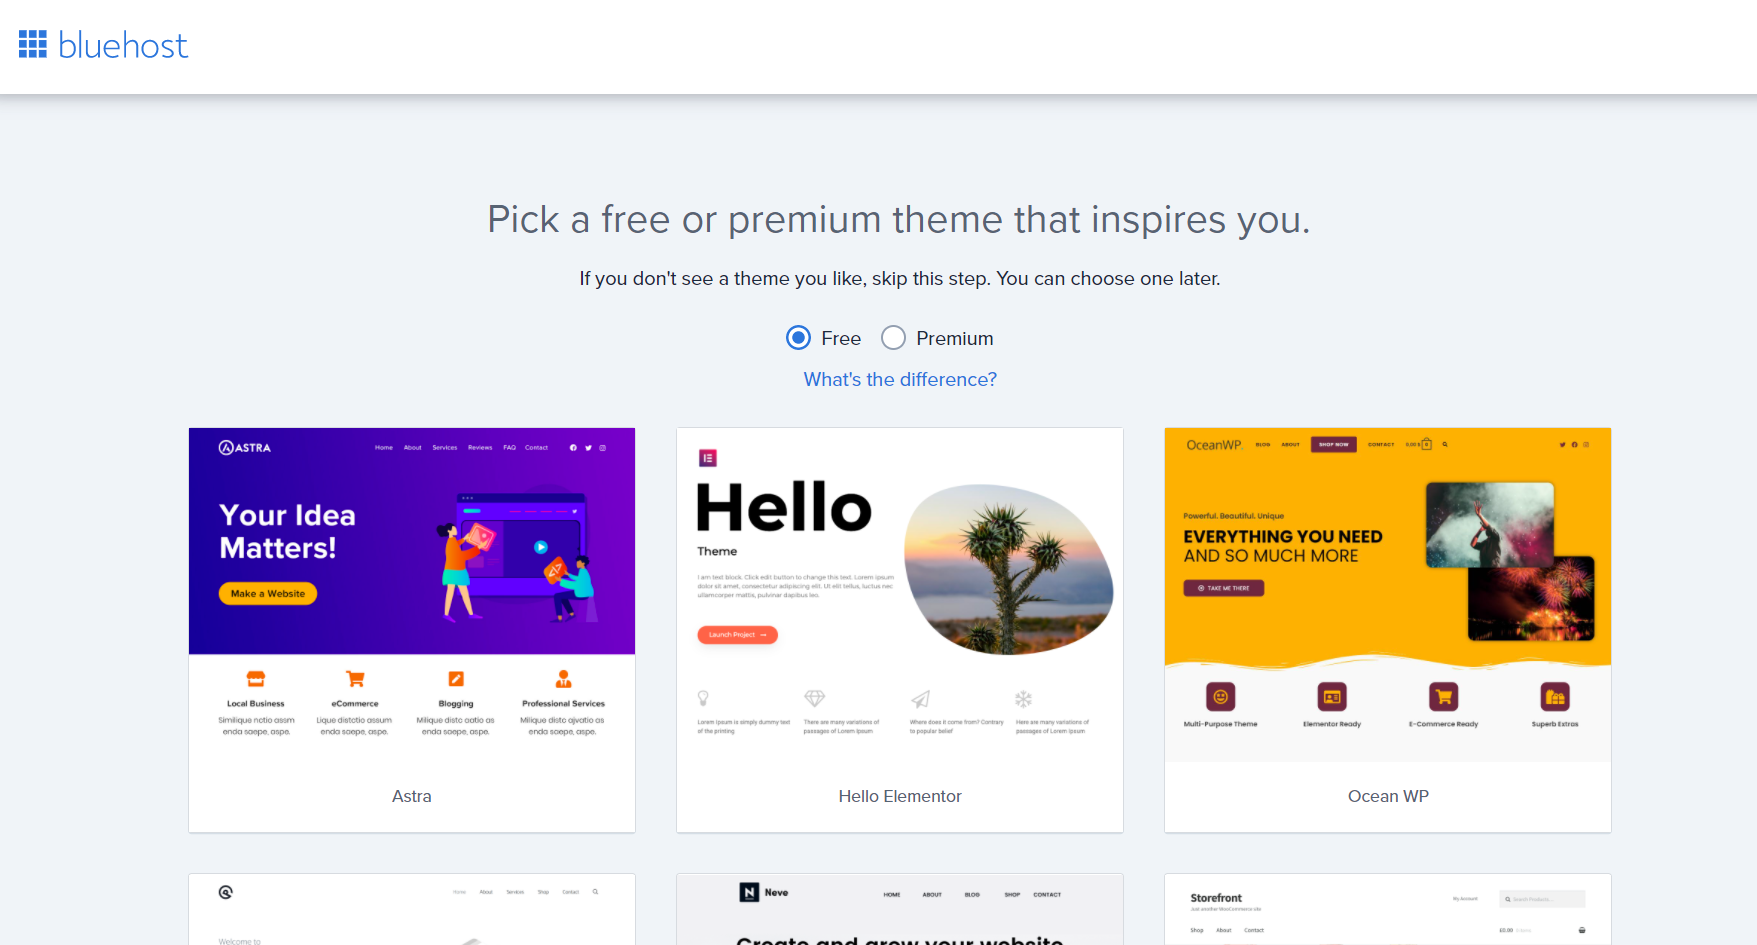 There are over 100+ free and premium themes to choose from. You can scroll through the page and preview a theme before deciding on it. To select a theme, click on the theme image.
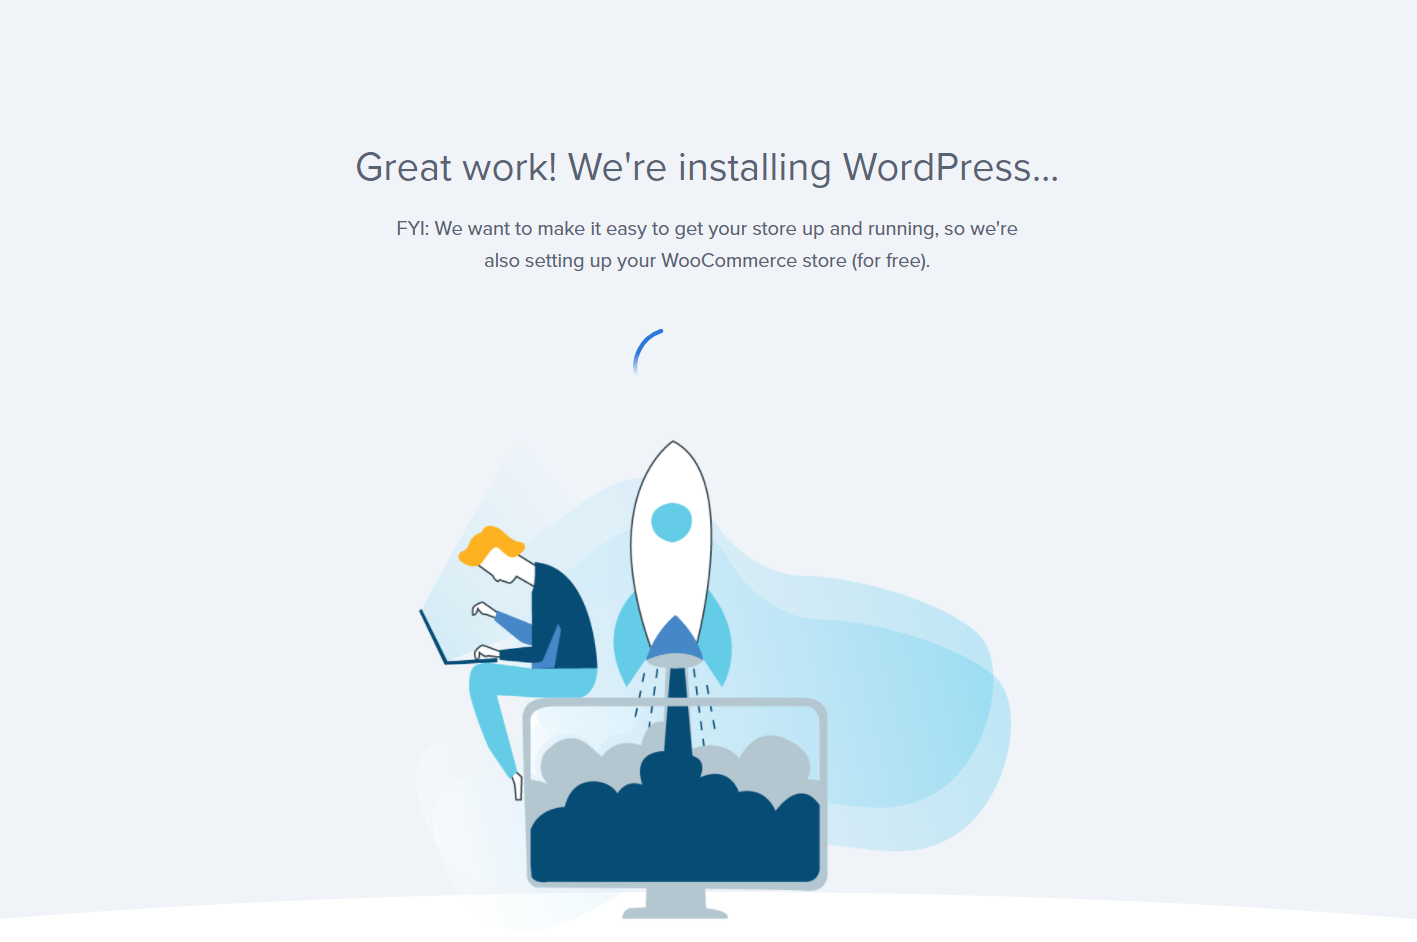
After you’re done selecting your website theme, you will be redirected to your Bluehost dashboard. In the meantime, WordPress will also be automatically installed and an online store will be set up so you can easily customise it.
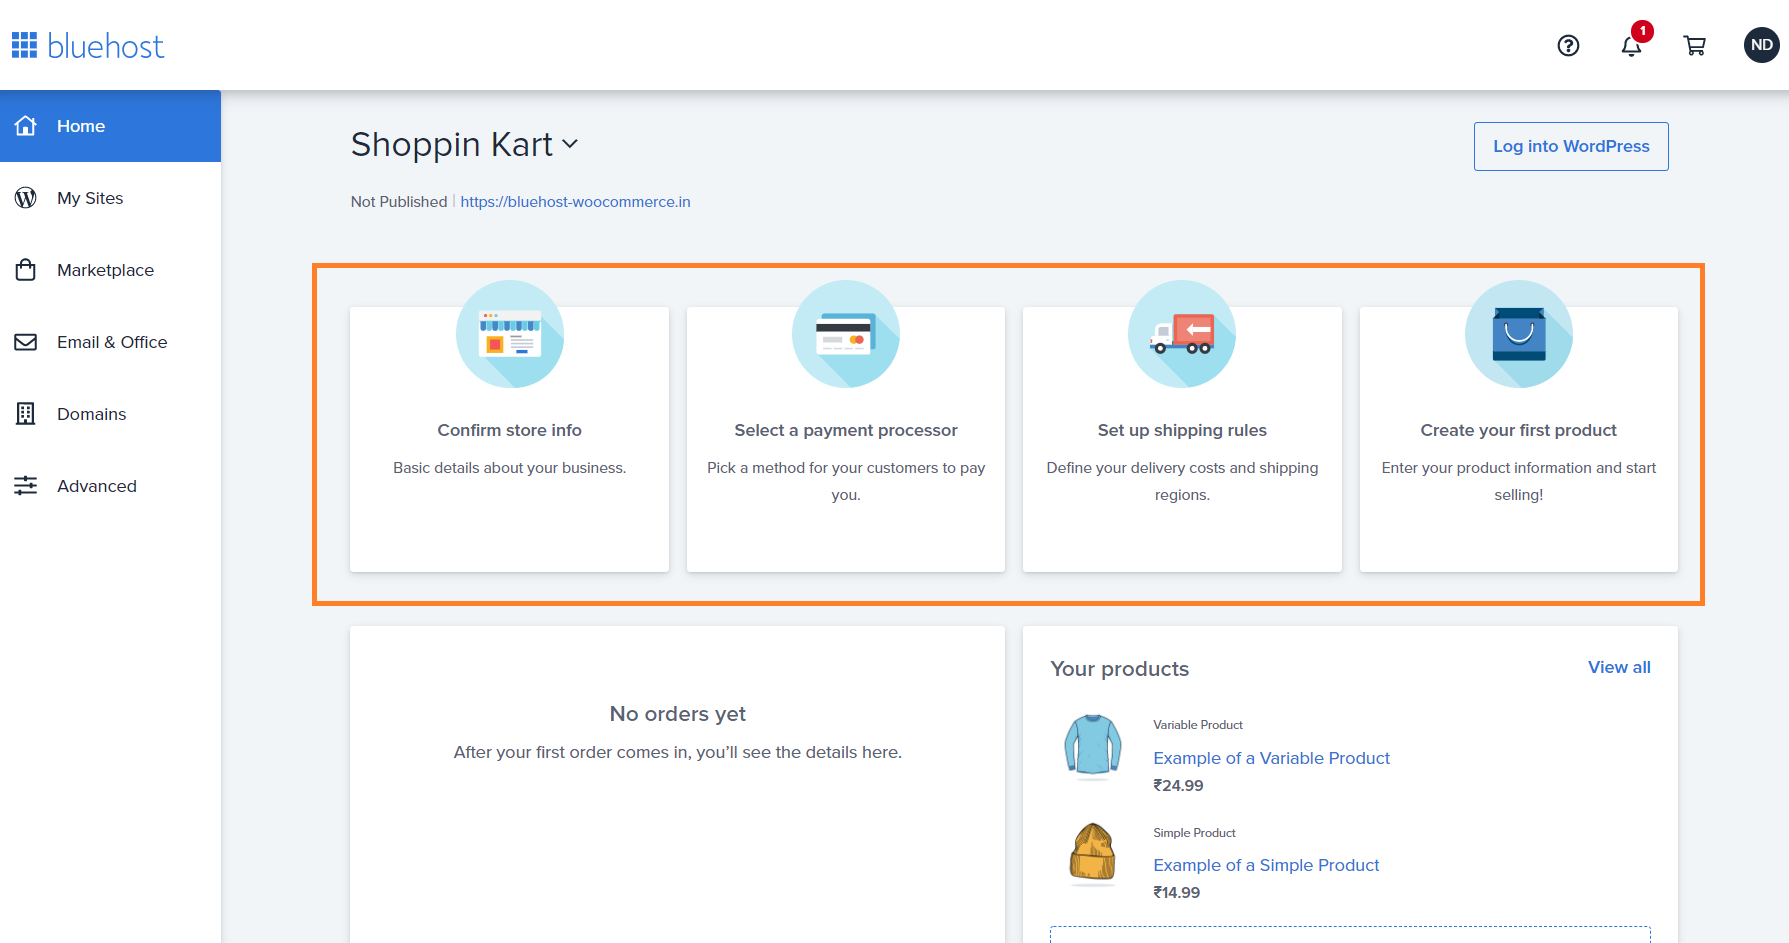
Step 7: Once you log in to your Bluehost account, your dashboard will reflect all you need to do for setting up your online store. Along with this, the dashboard also helps you keep a track of your orders and manage them with ease.
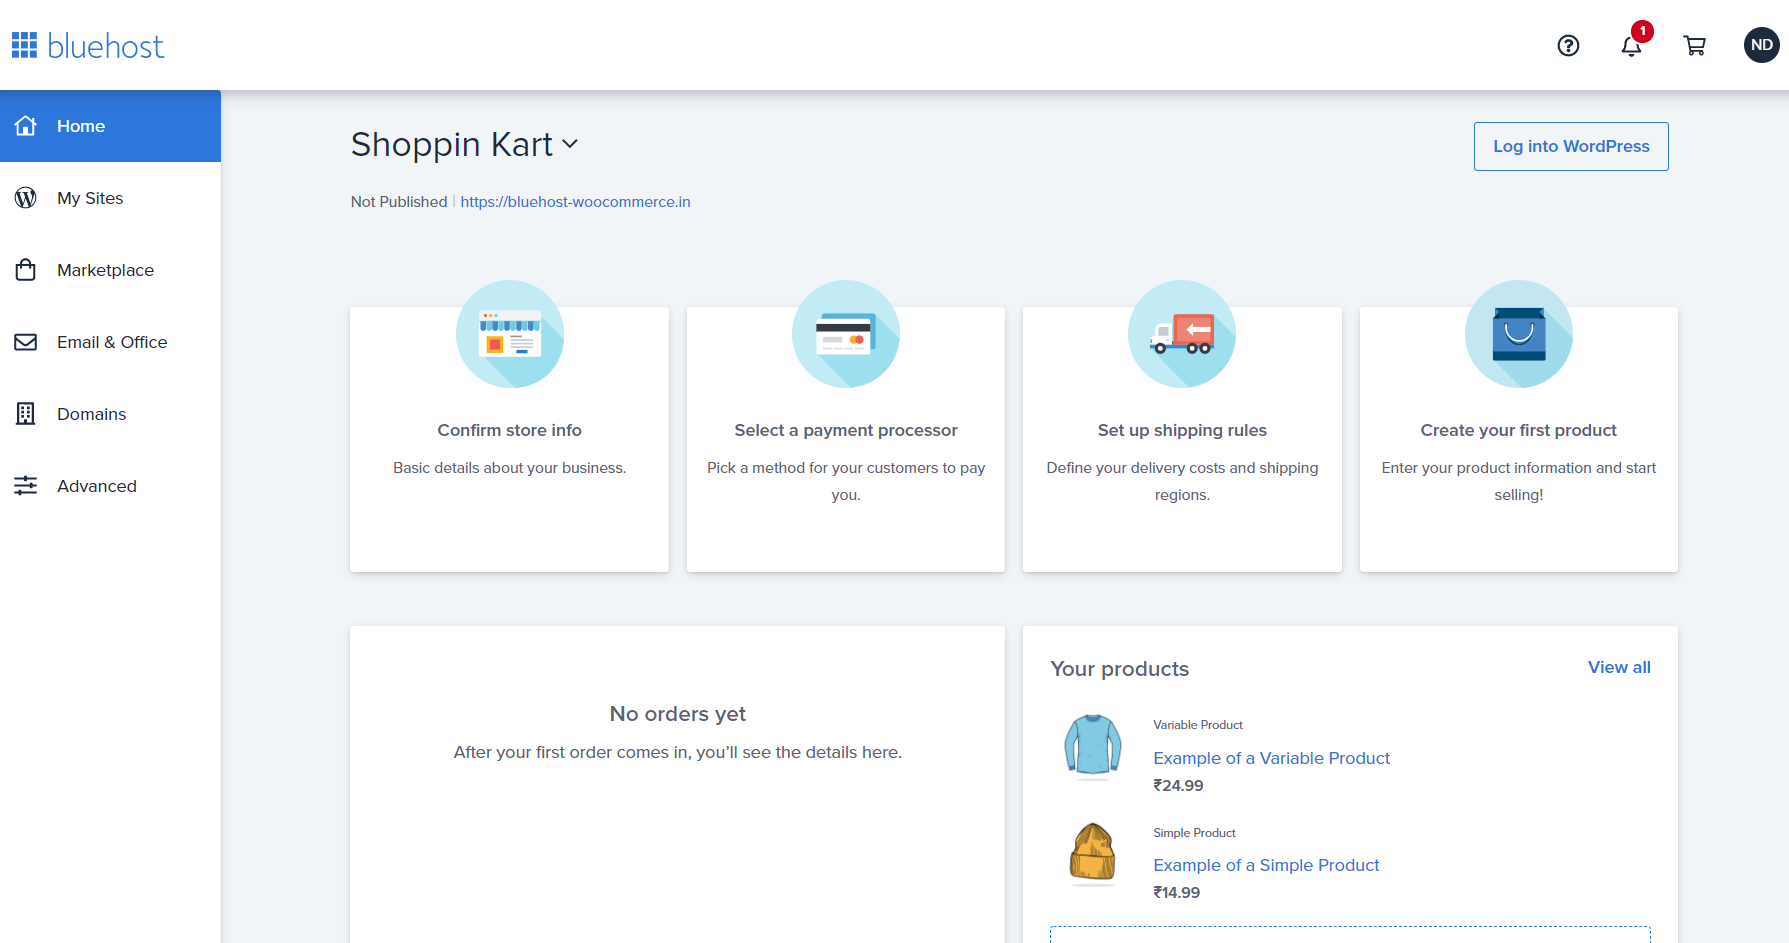
First and foremost, you can add the following information to your store –
- Add your store’s information by clicking on ‘Confirm store info’
- Add different payment options for your customers by clicking on ‘Select a payment processor’
- Define shipping and delivery options by clicking on ‘Set up shipping rules’
- Add products to your online store by clicking on ‘Create your first product’
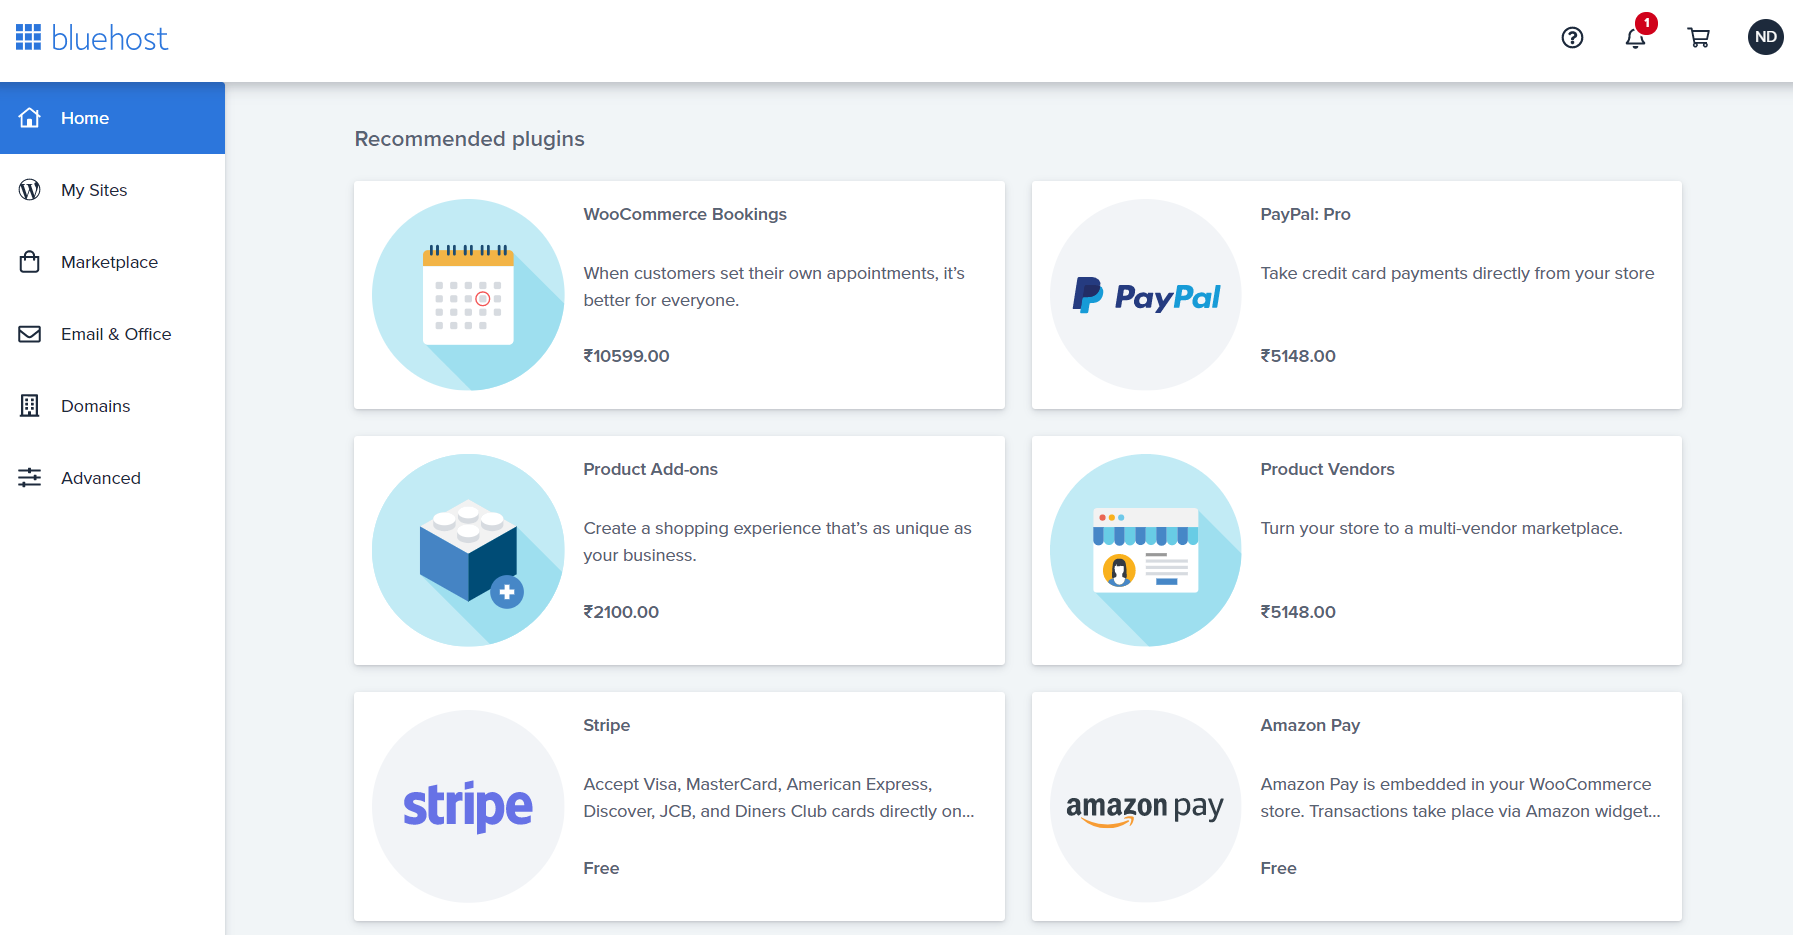
Furthermore, as you scroll down your dashboard’s home page, you can install and manage plugins for your online store.
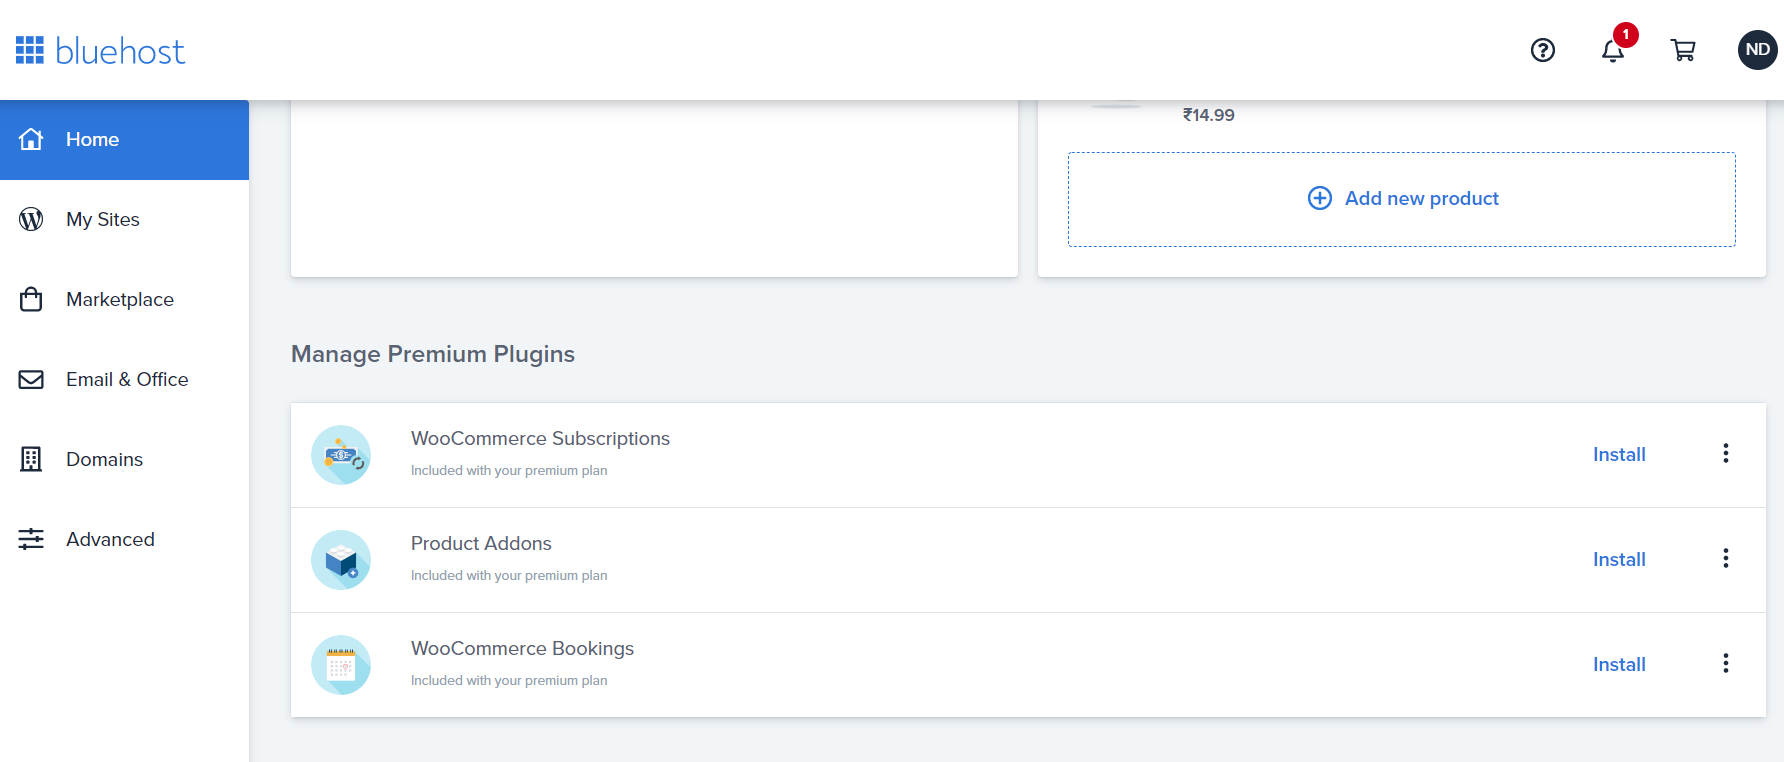
Some of the recommended plugins are WooCommerce Bookings, Stripe payment method, Product Add-ons, and more.
 Step 8: After you add the basic information to set up your online store it is time to add products to your online store.
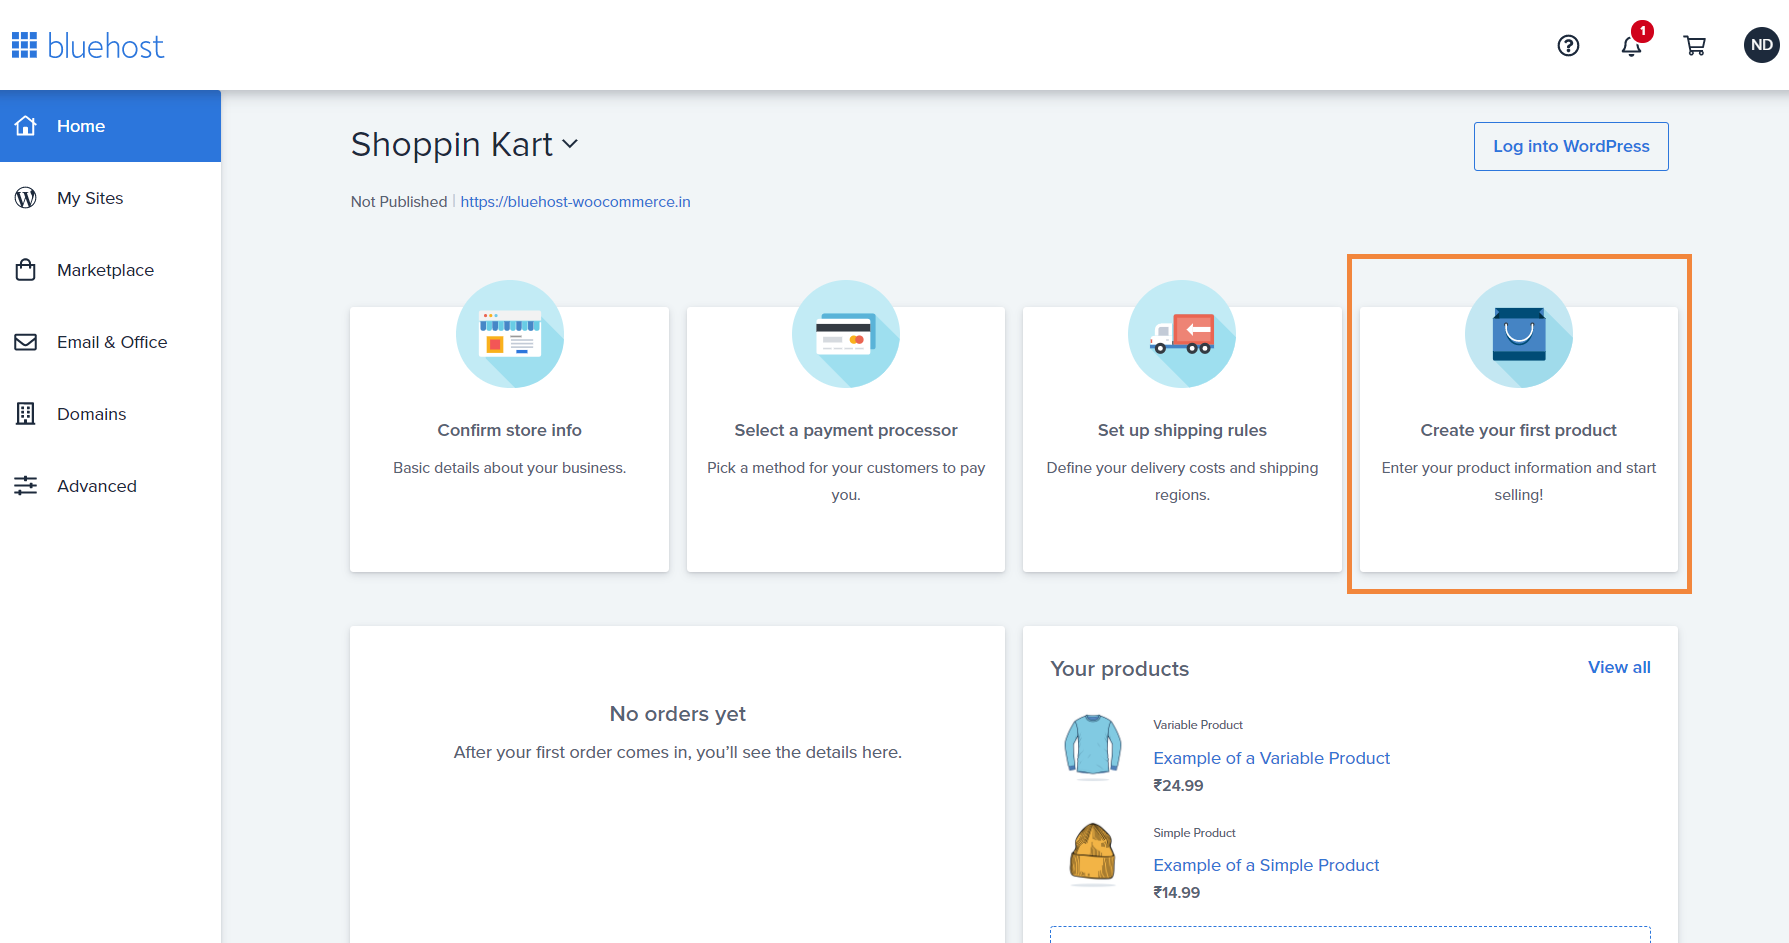
To add a product, click on the ‘Create your first product’ tab. A new window will pop up. There are two ways of adding products to your online store viz.
- Entering each product manually
- Entering product information viz a CSV file
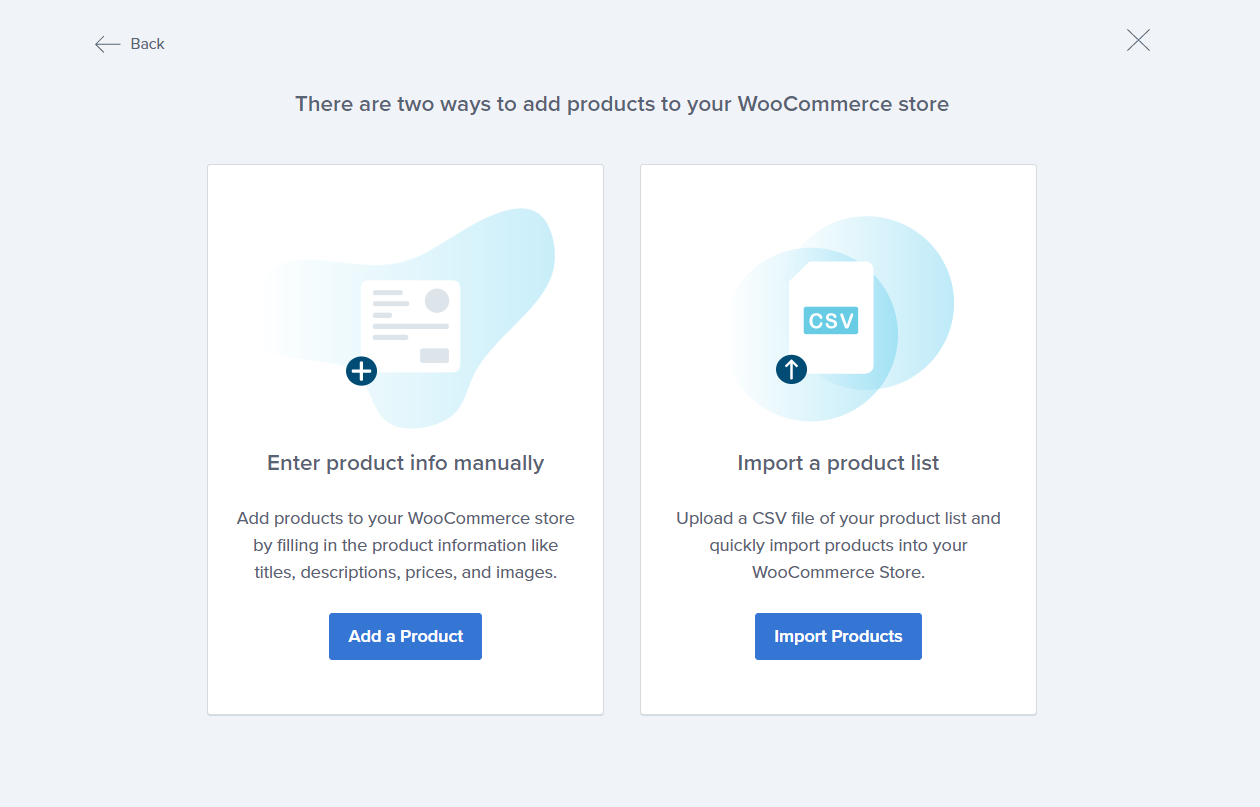
If you have several products, you can quickly import them using a product list file, otherwise, you can add products one at a time.
After clicking on either of the options, you will be automatically redirected to your WordPress backend. Here you can design and customise the layout of your online store, add content, and finally hit publish once your website is ready.
So, what are you waiting for? Set up your online store today and experience a whole new world with our enhanced Bluehost online store today!
Furthermore, if you want to learn how to build, grow, and maintain your online website, get professional support from our experts. If you have any questions or comments please feel free to drop them below. For more, visit our Web Hosting Category page.

